
In an unpredictable world, it’s essential to be prepared for unforeseen circumstances that may require you to rely on your resourcefulness and survival skills. Building a comprehensive survival kit is a crucial step towards ensuring your well-being in emergency situations. This article will guide you through the selection and use of essential survival tools, including the walkie talkie, LifeStraw water filter, purified water tablets, emergency radio, solar generator, flashlight, and army kit. By the end, you’ll be equipped with the knowledge and tools necessary to face any survival situation with confidence.
Shocking Device Extracts 10 Gallons of Water a Day From Dry Desert Air
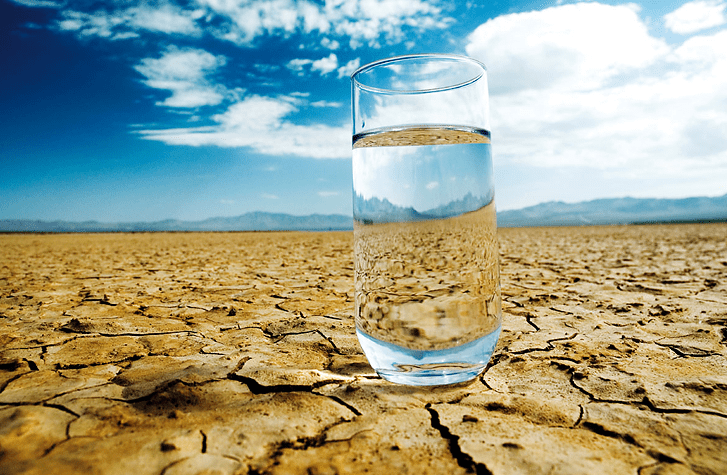
You need to have a constant, reliable, portable, off grid water source.
And in this short presentation you’ll learn how to do just that. Because the surprising invention the Israeli army uses, actually EXTRACTS WATER OUT OF SURROUNDING AIR… It’s a “portable water generator” that gives up to 50 gallons of water per day. It doesn’t matter if all the wells are dried-out… or if you live in the desert… where it’s so dry that even all the cactuses died…
The secret Ancient Egypt never wanted to let go of, now your!
Your Essential Survival Kit
1: Walkie Talkie – Staying Connected in Isolation.
1.1 Understanding the Importance of Communication
In survival situations, communication plays a vital role in ensuring your safety and coordinating efforts with others. Whether you’re facing natural disasters, outdoor adventures, or emergencies, having a reliable means of communication like a walkie talkie can be a game-changer. Unlike mobile phones that rely on cellular networks, walkie talkies use radio frequencies to transmit and receive messages, making them ideal for situations where traditional communication methods may fail.
1.2 Features and Benefits of Walkie Talkies
Walkie talkies come with a range of features designed to enhance usability and performance in different scenarios. Look for models that offer a long communication range, preferably several miles, to ensure connectivity over extended distances. Additionally, consider features like weather resistance, durability, battery life, and ease of use. Some advanced models even offer built-in GPS capabilities, emergency alert systems, and hands-free operation for added convenience.
The benefits of walkie talkies are numerous. They enable real-time communication, allowing you to relay important information, coordinate rescue efforts, or stay in touch with your group members. Walkie talkies also provide a sense of security and peace of mind, knowing that you can reach out for help or assistance when needed, even in remote areas where cell phone coverage is limited or non-existent.

The Home Doctor – Practical Medicine for Every Household
If you want to see what happens when things go south, all you have to do is look at Venezuela: no electricity, no running water, no law, no antibiotics, no painkillers, no anesthetics, no insulin or other important things.
1.3 How to Choose the Right Walkie Talkie for Your Survival Kit
Selecting the right walkie talkie for your survival kit requires careful consideration of several factors. First, determine the range you need based on your typical activities or potential survival scenarios. If you primarily engage in outdoor adventures, a walkie talkie with a range of a few miles may suffice. However, if you anticipate venturing into more remote or challenging environments, consider investing in models with extended ranges.
Next, assess the durability and weather resistance of the walkie talkie. Look for devices with rugged construction, waterproof or water-resistant capabilities, and shockproof features to withstand harsh conditions. This ensures that your walkie talkie remains operational even in extreme weather or accidental drops.
Battery life is another crucial consideration. Opt for models with long battery life or those that can be easily recharged using solar panels or hand-crank chargers. Additionally, consider the availability and affordability of replacement batteries or rechargeable options, as you’ll want to have spares on hand.
1.4 Practical Applications and Communication Strategies
Walkie talkies offer a wide range of practical applications in survival situations. They allow you to stay connected with your group members during hikes, camping trips, or any outdoor activity where distances may separate you. In emergencies, walkie talkies facilitate swift communication with rescue teams, providing critical information about your location, injuries, or immediate needs.
To make the most of your walkie talkie, it’s essential to establish effective communication strategies. Assign specific channels or frequencies for different purposes, such as emergency calls, general communication, or group coordination. Use clear and concise messages to convey information efficiently, keeping in mind that others may be listening on the same channel. Establish regular check-in times to ensure everyone’s safety and well-being.
1.5 Maintenance and Best Practices for Walkie Talkies
Proper maintenance of your walkie talkie is crucial to ensure its longevity and optimal performance. Regularly inspect the device for any signs of damage, including cracks, loose parts, or worn-out buttons. Clean the exterior using a soft cloth and mild detergent, avoiding excessive moisture that may damage internal components. Store your walkie talkie in a dry, protected place to prevent dust, moisture, or extreme temperatures from affecting its functionality.
Regularly check and replace batteries as needed to maintain reliable power. It’s advisable to carry spare batteries or a portable charger to ensure uninterrupted communication during extended periods in the field. Familiarize yourself with the battery replacement process and ensure you have the necessary tools readily available.
Additionally, periodically check the antenna for any signs of wear or damage. A damaged antenna can negatively impact signal strength and range. If necessary, replace the antenna following the manufacturer’s guidelines.
Finally, keep your walkie talkie’s user manual handy and refer to it for specific maintenance instructions and troubleshooting tips. Regularly update your knowledge of the device’s features and functions to make the most of its capabilities.
Section 2: LifeStraw Water Filter – Quenching Your Thirst
2.1 The Significance of Clean Water in Survival Situations
Access to clean drinking water is essential for survival. In emergency situations, natural disasters, or outdoor adventures, the availability of safe drinking water may be limited. This is where the LifeStraw water filter becomes an indispensable tool. By filtering out harmful contaminants and bacteria, the LifeStraw ensures that you can safely consume water from various sources, reducing the risk of waterborne illnesses.

Master woodwork! Here’s Some Advice That’ll Save You $$$
These is a private catalog of plans drafted by me and my students that you cannot find anywhere else.
2.2 Introduction to LifeStraw Water Filter
The LifeStraw water filter is a compact and portable filtration device that employs advanced filtration technology to remove bacteria, parasites, microplastics, and other impurities from water. It operates without the need for batteries or electrical power, making it ideal for survival situations where resources are limited.
2.3 How LifeStraw Water Filters Work
LifeStraw filters use a hollow fiber membrane system to trap and remove contaminants from water. The membrane consists of microscopic pores that allow water to pass through while blocking harmful particles. As you sip water through the LifeStraw, it undergoes a physical filtration process that removes up to 99.9999% of bacteria, 99.9% of protozoan parasites, and significantly reduces turbidity.
2.4 Selecting the Right LifeStraw for Your Needs
LifeStraw offers a range of products designed for different purposes and capacities. The LifeStraw Personal Water Filter is compact and lightweight, making it suitable for individual use during outdoor activities or emergencies. The LifeStraw Family Water Filter is designed to provide clean water for larger groups, with a higher filtration capacity and longer lifespan.
Consider the duration of your outdoor trips, the number of people in your group, and the availability of water sources when selecting the right LifeStraw product for your needs. Additionally, check the product specifications to ensure compatibility with the types of contaminants you may encounter in your environment.
2.5 Proper Use and Maintenance of LifeStraw Filters
Using a LifeStraw water filter is straightforward. Simply place the inlet end of the filter into the water source and suck water through the straw. The filtered water will then pass through the membrane and into your mouth. It’s important to note that LifeStraw filters are designed for personal use and are not suitable for filtering large quantities of water.
To maintain the LifeStraw’s effectiveness, it’s essential to follow proper maintenance procedures. After each use, blow air through the straw to remove any residual water and prevent clogging. If the flow rate begins to decrease significantly, clean the filter by backwashing it with clean water. Avoid using detergents or cleaning agents, as they may damage the filtration membrane. With proper care and maintenance, a LifeStraw water filter can provide you with clean drinking water for an extended period.

Get Fit and prepare for what’s coming!
Relieve Stress, Calm your mind and Boost your confidence with these time-tested techniques!
Section 3: Purified Water Tablets – Portable Water Purification
3.1 Water Purification Tablets: A Brief Overview
Water purification tablets are compact and convenient tools for purifying water on the go. These tablets contain chemical agents that effectively kill or neutralize bacteria, viruses, and other harmful microorganisms present in untreated water, making it safe for consumption. They are an excellent addition to your survival kit, providing a lightweight and portable solution for obtaining clean drinking water in emergency situations or when outdoor water sources are unreliable.
3.2 Understanding Different Types of Water Purification Tablets
There are various types of water purification tablets available on the market, each employing different chemical agents to treat water. The two most commonly used types are chlorine-based tablets and iodine-based tablets.
Chlorine-based tablets release chlorine dioxide when dissolved in water. Chlorine dioxide is effective against a wide range of pathogens, including bacteria, viruses, and cysts. These tablets are typically fast-acting and provide reliable water purification.
Iodine-based tablets release iodine into the water, which kills bacteria, viruses, and some protozoa. They are generally effective against common waterborne pathogens but may not be as effective against certain types of cysts and parasites. It’s important to note that individuals with iodine allergies or thyroid conditions should avoid using iodine-based tablets.
3.3 How to Use Water Purification Tablets Effectively
Using water purification tablets is relatively simple. Follow the instructions provided by the manufacturer for the specific brand you have. Typically, the process involves the following steps:
- Fill a container with untreated water.
- Drop the appropriate number of water purification tablets into the water, as indicated by the instructions. The number of tablets required usually depends on the volume of water being treated.
- Stir the water to ensure that the tablets dissolve completely.
- Allow the water to sit for the recommended contact time specified by the manufacturer. This allows the chemical agents to effectively disinfect the water.
- After the contact time has elapsed, the water is ready for consumption. However, if there is an unpleasant taste or odor, you can improve the taste by using a separate activated carbon filter or adding flavoring agents if available.
It’s important to note that water purification tablets may not be effective in removing sediment, chemicals, or heavy metals from water. If you suspect that the water source may contain such contaminants, it’s advisable to pre-filter the water using a cloth or portable water filter before using the purification tablets.
3.4 Safety Considerations and Storage Tips
While water purification tablets are generally safe for use, there are a few safety considerations to keep in mind. Firstly, read and follow the instructions provided by the manufacturer carefully. This includes adhering to the recommended dosage and contact time to ensure effective water purification.
Individuals with specific medical conditions, such as thyroid problems or allergies, should consult a healthcare professional before using iodine-based tablets. In such cases, alternative water purification methods should be considered.
When storing water purification tablets, keep them in a cool, dry place, away from direct sunlight. Exposure to moisture or heat can degrade the tablets and reduce their effectiveness. Additionally, check the expiration date on the packaging and replace any expired tablets to ensure their reliability.
3.5 Comparing LifeStraw Filters and Water Purification Tablets
Both LifeStraw filters and water purification tablets serve the purpose of providing clean drinking water in survival situations. However, they differ in their approach and suitability for specific circumstances.
LifeStraw filters offer a physical filtration method that removes bacteria, parasites, and other contaminants directly from the water as you drink. They are ideal for personal use and are effective in situations where water sources may be turbid or contain visible particles. LifeStraw filters are reusable and do not require chemical additives, making them a sustainable option.
Water purification tablets, on the other hand, use chemical agents to disinfect water. They are lightweight, portable, and suitable for treating larger volumes of water. Water purification tablets are effective against a broad range of microorganisms and can be used when water clarity is less of a concern.
The choice between LifeStraw filters and water purification tablets depends on factors such as personal preference, water source conditions, and the need for individual versus group use. In some cases, combining both methods may provide an optimal solution for obtaining clean drinking water in challenging survival scenarios.
Section 4: Emergency Radio – Staying Informed
4.1 The Importance of an Emergency Radio in Survival Situations
In survival situations, staying informed about the latest updates, weather conditions, and potential dangers is crucial. This is where an emergency radio becomes an invaluable tool. Unlike smartphones or other electronic devices that rely on cellular networks or internet connectivity, emergency radios are designed to receive broadcasts from local AM/FM stations, as well as NOAA (National Oceanic and Atmospheric Administration) weather alerts. They provide a reliable source of information, helping you make informed decisions and stay prepared for any upcoming challenges or emergencies.
4.2 Features and Benefits of Emergency Radios
Emergency radios are specifically designed to be robust, portable, and easy to use. They often come equipped with a variety of features to enhance their functionality in survival situations. Some key features to consider when choosing an emergency radio include:
- AM/FM and NOAA Weather Band: Look for a radio that offers AM and FM frequencies, allowing you to access news, updates, and entertainment channels. Additionally, the inclusion of NOAA Weather Band reception is essential for receiving weather alerts and emergency information directly from official sources.
- Multiple Power Sources: Choose an emergency radio that offers multiple power options, such as battery operation, solar charging, hand-crank charging, and the ability to use external power sources like USB or AC adapters. This ensures that you have alternative ways to power the radio when traditional power sources are unavailable.
- Built-in Flashlight and Charging Capabilities: Many emergency radios come with built-in flashlights, which can be incredibly useful during power outages or nighttime emergencies. Some models even feature USB ports or built-in power banks, allowing you to charge your other electronic devices using the radio’s battery.
- Durability and Water Resistance: Opt for a rugged and water-resistant emergency radio that can withstand harsh conditions, drops, and exposure to moisture. This ensures its reliability and longevity, especially in outdoor or emergency situations.
4.3 Selecting the Right Emergency Radio for Your Survival Kit
When choosing an emergency radio for your survival kit, consider your specific needs and the potential scenarios you may encounter. If you primarily plan to use the radio in urban areas with reliable signal coverage, a compact and portable model may be sufficient. However, if you anticipate venturing into remote or challenging environments, look for radios with extended reception range or even shortwave capabilities.
Consider the size and weight of the radio, as well as its power requirements. Smaller radios are more portable, but they may have limitations in terms of battery life and output power. Evaluate your power needs based on the duration of your trips or potential emergency situations. Look for radios that offer a balance between power efficiency and performance.
Additionally, read reviews and consider feedback from other users to gauge the reliability and performance of the emergency radio you are considering. Pay attention to factors such as signal reception, durability, battery life, and ease of use to make an informed decision.
4.4 Practical Applications of Emergency Radios
Emergency radios have numerous practical applications in survival situations. Here are a few examples:
- Accessing Information: During natural disasters or emergencies, traditional communication channels may be disrupted. An emergency radio allows you to tune into local AM/FM stations and receive important updates, news, and emergency alerts.
- Weather Monitoring: NOAA Weather Band reception is a critical feature of emergency radios. It enables you to receive real-time weather forecasts, severe weather alerts, and emergency bulletins, helping you stay prepared and make informed decisions.
- Communication and Coordination: Emergency radios can also serve as communication tools, allowing you to listen to broadcasts from local authorities, emergency response teams, or other individuals in your group. This helps in coordinating efforts, sharing information, and staying connected with the broader community.
- Entertainment and Mental Well-being: In stressful or isolated situations, an emergency radio can provide entertainment, music, and programs that help alleviate anxiety and maintain a sense of normalcy.
4.5 Maintenance and Tips for Using an Emergency Radio
To ensure the optimal performance of your emergency radio, regular maintenance and proper usage are essential. Here are some maintenance tips and best practices:
- Keep the radio clean and free from dust, dirt, and moisture. Use a soft cloth or brush to remove any debris from the exterior and the speaker grille.
- Store the radio in a dry and safe location when not in use. Avoid extreme temperatures, direct sunlight, or prolonged exposure to moisture.
- Periodically check the battery level or power source and recharge or replace batteries as needed. If your emergency radio has a hand-crank or solar charging option, familiarize yourself with the recommended charging time and procedure.
- Test your emergency radio periodically to ensure that it is in proper working condition. Tune into different AM/FM stations and NOAA weather channels to verify reception and sound quality.
- Familiarize yourself with the radio’s features, controls, and functions before an emergency situation arises. Keep the user manual in a safe place and refer to it as needed.
Solar Generator – Powering Your Survival Needs
5.1 The Importance of Power in Survival Situations
In survival situations, having access to power can significantly enhance your chances of survival and improve your overall comfort. Power allows you to charge essential electronic devices, run small appliances, and maintain communication. However, traditional power sources may be unavailable or unreliable during emergencies. This is where a solar generator comes into play, providing a renewable and sustainable power solution.
5.2 Understanding Solar Generators
A solar generator is a portable power station that harnesses energy from the sun and converts it into electricity. It consists of three main components: solar panels, a battery pack, and an inverter. The solar panels capture sunlight and convert it into DC (direct current) electricity, which is stored in the battery pack. The inverter then converts the stored DC power into AC (alternating current) electricity that can be used to power various devices and appliances.
5.3 Benefits of Using a Solar Generator
Solar generators offer several advantages in survival situations:
- Renewable and Sustainable Power: Solar energy is a renewable resource, making it an environmentally friendly and sustainable power solution. As long as the sun is shining, you have access to a consistent source of energy.
- Independence from Traditional Power Sources: With a solar generator, you are not reliant on traditional power grids or fuel supplies. This independence is especially valuable during emergencies when power outages are common.
- Quiet and Emission-Free Operation: Unlike fuel-powered generators, solar generators operate silently and produce no harmful emissions or fumes. This makes them safe to use indoors or in enclosed spaces without the risk of carbon monoxide poisoning.
- Portability and Versatility: Solar generators are designed to be portable, allowing you to take them with you wherever you go. They are lightweight, compact, and often come with built-in handles or wheels for easy transportation. Additionally, most solar generators offer multiple power outlets and USB ports, making them versatile for charging various devices.
5.4 Selecting the Right Solar Generator for Your Needs
When choosing a solar generator for your survival kit, consider the following factors:
- Power Capacity: Assess your power needs based on the devices and appliances you plan to charge or run during emergencies. Look for a solar generator with sufficient power capacity to meet those needs. Pay attention to the generator’s wattage rating and the capacity of its battery pack.
- Charging Options: In addition to solar charging, many solar generators offer multiple charging options, such as AC power, car charging, or the ability to charge via a generator or wall outlet. Having different charging options provides flexibility and ensures that you can charge the generator even when sunlight is limited.
- Battery Type and Capacity: Consider the type of battery used in the solar generator. Lithium-ion batteries are commonly used due to their high energy density, lightweight nature, and longer lifespan. Additionally, evaluate the battery’s capacity, as it determines how long the generator can power your devices.
- Portability and Durability: Look for a solar generator that is lightweight, compact, and easy to transport. Consider the overall build quality, including the materials used and any protection against impact, dust, or water. A rugged and durable solar generator is better suited for survival situations.
- Expandability: Some solar generators offer the ability to expand their capacity by adding additional solar panels or external battery packs. This allows you to customize the system based on your evolving power needs.
5.5 Maintenance and Best Practices for Solar Generators
To ensure the optimal performance and longevity of your solar generator, follow these maintenance tips:
- Keep the solar panels clean and free from dirt, dust, or debris. Regularly wipe them with a soft cloth or use a gentle cleaning solution when necessary. Clean solar panels maximize the absorption of sunlight and improve overall charging efficiency.
- Store the solar generator in a dry and cool location when not in use. Avoid exposing it to extreme temperatures or prolonged sunlight exposure, as these can degrade the battery performance and overall lifespan.
- Periodically check the battery charge level and recharge it as needed. Avoid fully discharging the battery, as this can shorten its lifespan. If you anticipate long periods of non-use, store the generator with a partially charged battery.
- Familiarize yourself with the operation and controls of the solar generator before an emergency situation occurs. Keep the user manual in a safe place and refer to it when necessary.
- Test the solar generator periodically to ensure that it is functioning properly. Charge and discharge the battery, check the power output, and verify that all the ports and outlets are working correctly.
Flashlight – Illuminating the Path to Survival
6.1 The Importance of a Flashlight in Survival Situations
In survival situations, darkness can pose significant challenges and risks. Navigating through unfamiliar terrain, finding resources, and signaling for help become difficult without proper illumination. A flashlight is an essential tool in your survival kit, providing a reliable source of light to enhance visibility and ensure your safety during low-light conditions.
6.2 Features and Benefits of Flashlights
Flashlights come in a variety of sizes, types, and with various features. Here are some key features and benefits to consider when selecting a flashlight for survival purposes:
- Brightness and Beam Distance: Look for flashlights with high lumen output, as this indicates the brightness of the light emitted. Additionally, consider the beam distance, which measures how far the light can reach. A flashlight with a long beam distance is useful for signaling or searching in large areas.
- Battery Life and Power Source: Evaluate the flashlight’s battery life and power source. Choose flashlights that use long-lasting batteries or rechargeable options. Consider the availability and ease of replacing or recharging the batteries in emergency situations.
- Durability and Water Resistance: Survival situations can be harsh, involving exposure to water, extreme temperatures, or rough handling. Select flashlights that are built to withstand these conditions. Look for flashlights with rugged construction and a high water resistance rating, such as IPX7 or IPX8.
- Size and Weight: Portability is essential in survival scenarios. Opt for flashlights that are lightweight and compact, making them easy to carry and store in your survival kit or pocket.
- Multiple Lighting Modes: Flashlights with multiple lighting modes, such as high, low, strobe, and SOS, offer versatility in different situations. These modes allow you to adjust the brightness or signal for help when needed.
6.3 Selecting the Right Flashlight for Your Survival Kit
Choosing the right flashlight for your survival kit depends on several factors. Consider the following:
- Intended Use: Determine the primary purpose of the flashlight in your survival kit. Are you using it for general illumination, signaling, or search and rescue? Different scenarios may require specific features, such as a long beam distance or a tactical design for self-defense purposes.
- Runtime: Evaluate the expected duration of your survival situation. Look for flashlights with extended battery life or consider carrying spare batteries to ensure continuous illumination throughout the duration.
- Ease of Use: Consider the flashlight’s user-friendliness. Look for flashlights with intuitive controls and ergonomic designs that are easy to operate even in stressful situations.
- Compatibility with Other Gear: If you have other gear or accessories in your survival kit, ensure that the flashlight is compatible or can be easily mounted or attached to your equipment. This ensures convenient access and keeps your hands free for other tasks.
- Reviews and Recommendations: Read reviews and seek recommendations from other survival enthusiasts or professionals to get insights into the reliability and performance of different flashlight models. Consider factors such as durability, brightness, and overall satisfaction from actual users.
6.4 Maintenance and Best Practices for Flashlights
To ensure the longevity and optimal performance of your flashlight, follow these maintenance tips:
- Regularly check the battery level or charge of your flashlight. Replace or recharge the batteries as needed to ensure reliable operation.
- Keep the flashlight clean and free from dirt, debris, or moisture. Wipe the exterior with a soft cloth and use a toothbrush or compressed air to remove any accumulated dirt in the crevices.
- Check the functionality of the flashlight’s switches, modes, and other features. Test the different lighting modes periodically to ensure they are working properly.
- Store the flashlight in a dry and secure location, away from extreme temperatures or direct sunlight. This protects the batteries and prevents any damage to the flashlight’s components.
- Inspect the flashlight’s O-rings and seals regularly. Replace them if they show signs of wear or damage to maintain the flashlight’s water resistance.
Conclusion:
A flashlight is a vital tool in any survival kit, providing essential illumination during low-light or dark conditions. When selecting a flashlight, consider factors such as brightness, beam distance, battery life, durability, and size. Choose a flashlight that suits your specific needs and the demands of your survival situation. By properly maintaining and following best practices for flashlight usage, you can rely on this invaluable tool to light your way and enhance your safety and visibility in challenging survival scenarios.
Section 7: Army Kit – Essential Tools for Survival
7.1 The Importance of an Army Kit in Survival Situations
An army kit, also known as a military kit or tactical kit, is a collection of essential tools and equipment designed to assist individuals in survival situations. These kits are specifically curated to provide the necessary tools for self-reliance, adaptability, and preparedness in challenging environments. The inclusion of an army kit in your survival gear ensures that you have the tools needed to handle various tasks and increase your chances of survival.
7.2 Components of an Army Kit
An army kit typically consists of a range of tools and equipment that serve multiple purposes. While the specific contents may vary depending on personal preferences and intended use, here are some common components found in an army kit:
- Multi-Tool: A versatile tool that combines various functions, such as pliers, knives, screwdrivers, and wire cutters, in a compact design. A multi-tool is invaluable for a wide range of tasks, from repairing equipment to preparing food.
- Folding Knife: A reliable folding knife with a sturdy blade is essential for cutting ropes, preparing food, and general utility purposes. Look for a knife with a locking mechanism for added safety.
- Paracord: A strong and lightweight cord made of nylon, paracord has numerous uses in survival situations. It can be used for building shelters, securing equipment, creating snares, or crafting other tools.
- Fire Starter: A fire starter, such as a ferrocerium rod or waterproof matches, is crucial for creating fire, providing warmth, cooking food, and signaling for help. Ensure your army kit includes a reliable fire-starting tool.
- Compass: A compass helps you navigate and maintain a sense of direction in unfamiliar terrain. Look for a durable and accurate compass with clear markings and a liquid-filled capsule for stability.
- First Aid Kit: A compact and well-stocked first aid kit is essential for treating minor injuries and addressing medical emergencies. It should include items such as bandages, antiseptic wipes, pain relievers, and adhesive tape.
- Whistle: A loud whistle can be used to attract attention and signal for help. Choose a whistle with a built-in compass and a lanyard for easy access.
- Duct Tape: Duct tape is a versatile and multipurpose adhesive that can be used for temporary repairs, securing items, or creating improvised tools.
- Water Purification Tablets: In survival situations where clean water may be scarce, water purification tablets can help make water safe for drinking by eliminating harmful bacteria and parasites.
- Signal Mirror: A small mirror with a reflective surface can be used to signal for rescue by reflecting sunlight towards potential rescuers.
- Waterproof Bag: A waterproof bag or dry sack keeps your equipment and supplies protected from moisture, ensuring their usability in wet conditions.
7.3 Customizing Your Army Kit
While the components mentioned above are common in an army kit, it’s important to customize your kit based on your specific needs, environment, and skill set. Consider the following factors when customizing your army kit:
- Geographic Location: The climate, terrain, and potential hazards of your geographic location should influence your choice of tools and equipment. For example, if you’re in a cold climate, you may need additional items like hand warmers or a compact snow shovel.
- Skill Level: Consider your level of expertise and familiarity with certain tools. It’s essential to choose tools that you know how to use effectively to maximize their utility in survival situations.
- Duration of Survival: The length of time you anticipate needing your army kit will influence the quantity of supplies you include. For longer durations, consider additional items such as extra batteries or additional water purification methods.
7.4 Maintaining Your Army Kit
To ensure the effectiveness and longevity of your army kit, proper maintenance is crucial. Follow these maintenance tips:
- Regularly inspect your tools and equipment for any signs of wear, damage, or corrosion. Replace or repair any items that are no longer functional or in good condition.
- Keep your tools clean and dry after each use. Wipe them down with a cloth and, if necessary, apply a light coating of lubricant to prevent rusting.
- Check the expiration dates on items like water purification tablets and first aid supplies and replace them as needed.
- Store your army kit in a cool, dry place away from direct sunlight and extreme temperatures. This helps preserve the integrity of the tools and extends their lifespan.
- Periodically review and update your army kit to ensure it remains relevant and meets your evolving needs. Remove items that are no longer necessary and replace them with more useful tools or equipment.